
Setting up and securing a new AWS account for learning/training
Creating and securing an AWS account is crucial and the first step that you’ll need if you want to learn or use AWS services for your projects. If you are looking into doing just that and get started, this is post is for you.
Prerequisites
- Unique email address - this will be the account root user. An account root user has full control over this specific AWS account that you’ll create and it can’t be restricted. Each AWS account can only be created using a unique email address. If you are using GMAIL as your email account provider, you can use its dynamic email alias feature to make unlimited unique email addresses. There are also other email provider that has this feature so you can check it yourself. So how does this work? Just follow the format username+identifier@gmail.com. Let’s say your main email address is johndoe@gmail.com, johndoe is your username, then add ‘+’ sign, then the identifier, for example aws1. So your unique email address is johndoe+aws1@gmail.com. The emails sent to these email aliases can be read on your main email account(johndoe@gmail.com).
- Credit card - this will be used for the billing method of the account. New accounts has free tier allocation so you won’t be billed unless you incur charges, i.e., you go over the free tier limit or used services outside the free tier. For PH users who don’t have credit card, you can use Maya virtual card, just make sure that you have at least $1 for verification.
- Phone to receive sms/calls
- Authenticator device or app - Authy, Google authenticator
Signup for new AWS account
- Go to https://portal.aws.amazon.com/billing/signup#/start/email and follow the steps on the screen.
- Choose Basic Support Plan - Free at the end of the step unless you need the higher tier support plan.
- Once your account has been created, proceed and login using the root user.
Enable IAM user and role access for billing
- Click on the account dropdown at the top-right, then go to Account.
- Scroll down to IAM User and Role Access to Billing Information section, then click edit.
- Tick the Activate IAM Access checkbox and click Update.
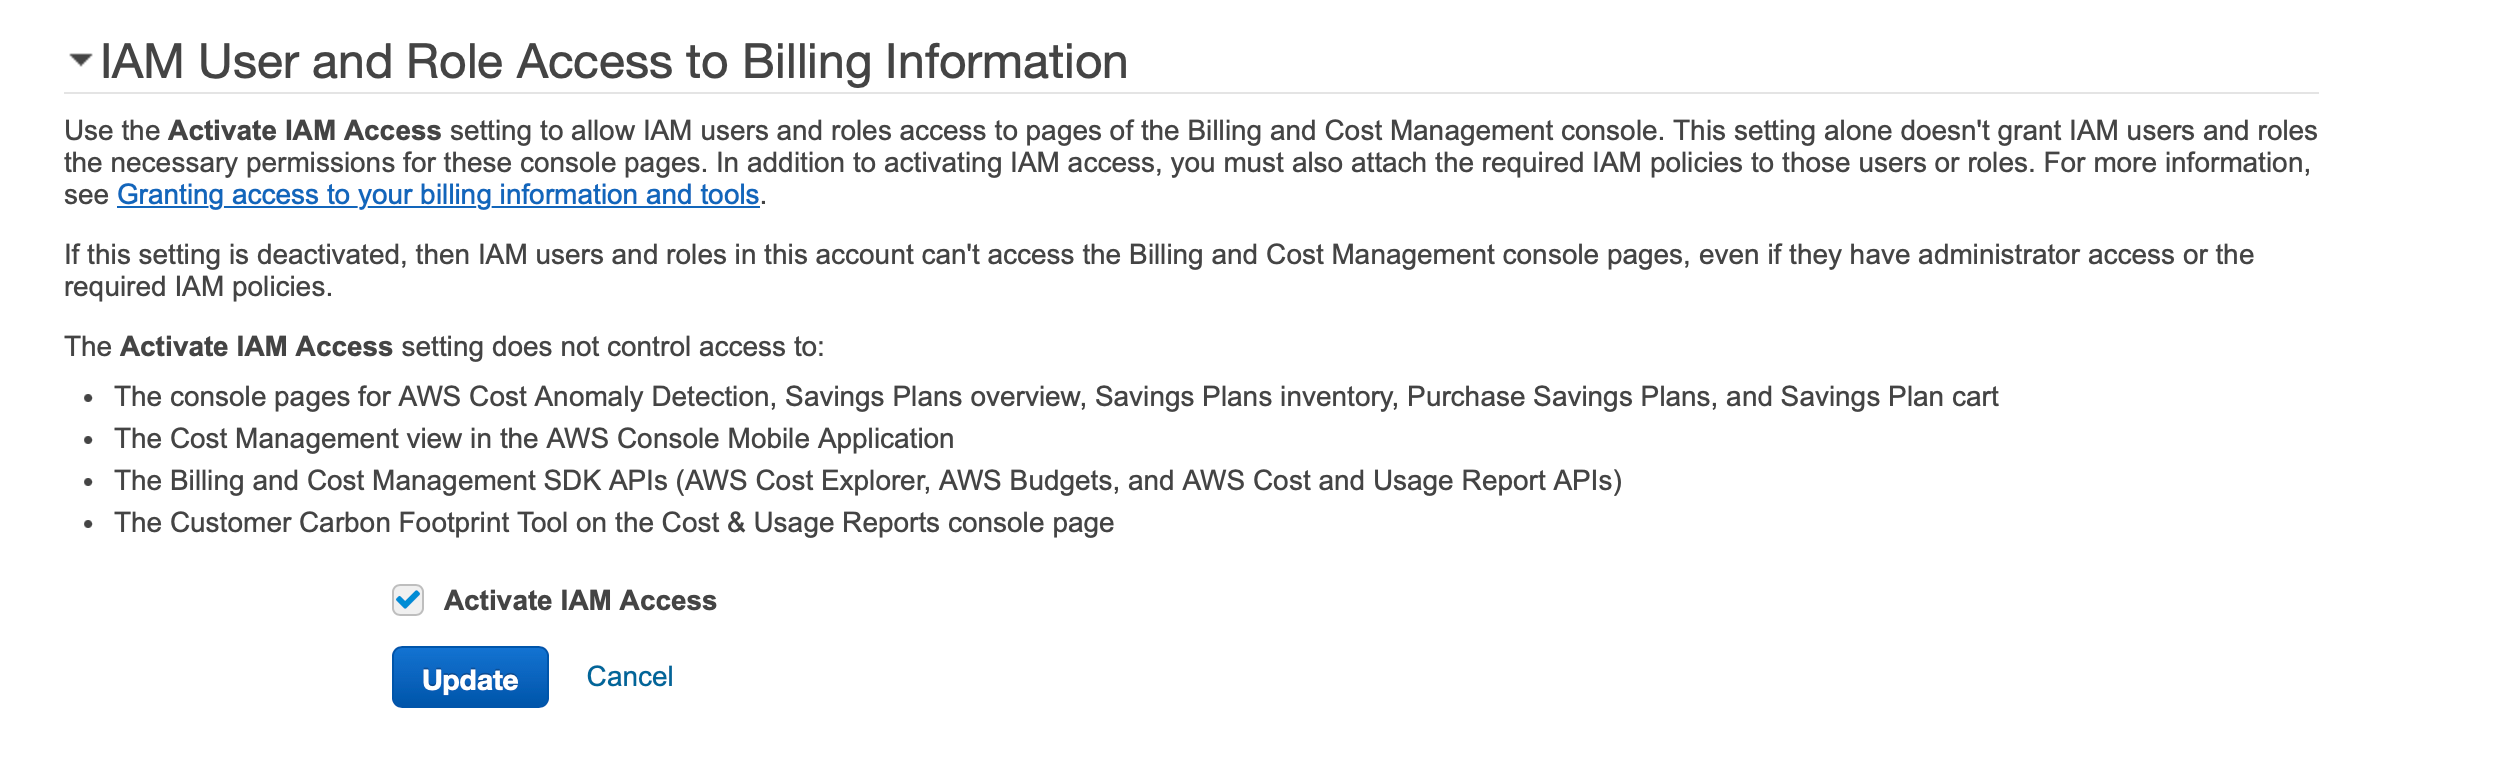
This option is to make user that IAM users to be able to access the billing console, provided that the user has permissions. If this option is unchecked, even if the IAM user has permission, it wouldn’t be able to access the billing console.
Enable MFA for security
As a 2nd level of security, you need to enable MFA. With MFA enabled, when a user signs in to AWS console, they will be prompted with the username and password, as well as the authentication code from the MFA device. MFA can be activated using a physical MFA device which generates random codes that always changes, or a virtual MFA device that is added to an MFA application such as Google Authenticator or Authy. I personally use Authy, so feel free to choose yours and install it.
- Head on to Security Credentials under the account dropdown on the top-right corner of the AWS console.
- Scroll down to Multi-factor authentication (MFA) section, then click on Assign MFA Device.
- Give the device a name, then choose your device type. In my case, it’s Authenticator App, then click on Next.
- Click Show QR Code, then scan the code using your authenticator app. Your app will now generate MFA code.
- Enter the 2 consecutive codes generated on the app, then click Add MFA.
You can test this one by signing out of the account, then logging back in. You’ll now be asked for the MFA code aside from the username and password.
Create billing alarms
Controlling costs within AWS is important if you want to avoid any bill-shock at the end of the month.
- Click on Billing Dashboard under the account dropdown.
- Click on Billing Preferences from the left navigation.
- Edit the Invoice delivery preferences and Alert preferences, and tick check all the options.
- Go to Budgets on the left navigation menu, then create budget.
- Select the Use a template option and select the template that’s right for you. Ideally, you should select Zero Spent Budget if you want to ensure that you remain on the free tier. Choose the Monthly Cost Budget otherwise if you have a monthly budget that you can spend outside the free tier.
- Fill out the necessary fields then click on Click budget.
Create IAM admin user
If you’ll be sharing this account to other user, i.e. your teammate, you’ll generally want to create a separate account, in this case, an IAM user inside your AWS account, instead of sharing them the one that you currently have. The associated account upon signing up for an AWS account is a root user. This has full unrestricted account. In most cases, you’ll want to give other users or applications access to your AWS account, and you want to restrict the access that they have. It’s best practice to only give permissions required to do certain task in the account.
In this step, you’ll be creating an IAM user with administrator role, so basically the same as the account root user.
- Click on services search box at the top and look for IAM and click it.
- On the right side under AWS Account, create an account alias, it must be unique.
- Click on Users on the left menu then click Add Users.
- Enter the details and tick the checkbox for Provide user access to the AWS Management Console.
- Select the option I want to create an IAM user, and supply the needed information.
- Click Next.
- On the next screen, select Attach policies directly.
- Search the check the box for AdministratorAccess under the permission policies.

- Click Next then Create user.
- To sign in using this user, get the sign in url from the IAM dashboard, then on the right side under AWS Account.
With the steps above, you are now good to go. Good luck and enjoy your journey with the AWS cloud.